Hosting a static site on GCP using Hugo
During my preparation for the GCP Associate Cloud Engineer exam, I wanted to go deeper in some real use case solutions.
One of the simple but great ways to use a managed object storage service is to host a complete static site; the faster and easier way to do so in GCP is using Cloud Storage product.
It’s a lot of years I didn’t own a personal blog so I decided to start having a new one as an exercise.
Googling around, I was looking for a static site generator, and a lot of names (some of them were unknown to me, to be honest) came out, flexing about great features.
While scrolling through the list, I found “HUGO - The world’s fastest framework for building websites”. Fuck yeah, I want to be faster than the light, so I decided to give Hugo a try.
Hugo
Impressions:
- Hugo homepage is neat and clean, quick start was the first button. Good.
- Hugo is written in GO. Good.
- Hugo is not written in Ruby. Good.
- Hugo is (obviously) opensource and hosted on GitHub. Good.
- Hugo themes are several and well designed. Good.
- Hugo comes with proper documentation. Good
Let’s start building basic site
All I’ll do comes from quickstart page.
Install Hugo
I use a recent version of Ubuntu, so it’ too easy:
sudo apt install hugo
A snapd version is also available. Binary packets are avaible for a different distros. If you use a Mac:
brew install hugo
To check proper installation, open a terminal and type:
hugo version
Create the site skeleton
Simply type:
hugo new site <your_site_name>
Jump inside newly created project and initialize a Git repo (always do it when you work on something)

git init
Obviously you should create a new remote and an initial commit/push to your preferred git hosting, I will not address this here.
Now, choose a theme. Themes are usually maintained in repos, so using them as submodules of your project could be a good practice. Themes should be placed under themes subdir.
I’ll use the Tranquilpeak theme
git submodule add https://github.com/kakawait/hugo-tranquilpeak-theme.git themes/hugo-tranquilpeak-theme
Related git repo is available as link button “Download” in the choosen theme page.
Configuration
To render properly, your site should be configured, in particular your themes needs for some strings/information to be displayed. These informations can be found in config.toml file.
Each theme comes with an example site, using its config.toml is a good starting point to refine unless style and behaviour fits you.
Backup original config.toml:
mv config.toml config.toml.ori
And copy the choosen theme config.toml in project dir:
cp themes/hugo-tranquilpeak-theme/exampleSite/config.toml config.toml
First post
Posts are written in Markdown, and it’s great. To create a new post, type:
hugo new first-post.md
Please find a less trivial name or think about the future contents and give the new file a proper name.
Edit your file:
---
title: "My First Post"
date: 2020-05-26T08:55:12+01:00
draft: true
---
# H1 Header
## H2 Header
Content goes here.
To preview your site, use Hugo integrated web server:
hugo serve
If you want to include draft files (like the one we just edited) in the rendering, add -D switch.
Simply open your browser at http://localhost:1313/
Now, keep your terminal open while hugo serve is running, also your browser, and start edit you config file and post files. A very fast re-rendereing will be triggered for any change detected in your site dir.
Start editing your config file. You can change all the site beahviour from here, adding and removing sections, changing your name, your bio, and obviously inserting your desired domain.
Visit your choosen theme homepage for config reference and customization tips.
Edit you posts, create and delete, you can insert other static content as images to be included in your markdown copying files in static/images.
When you’re ok with the content and look and feel, stop hugo serve process and type symply:
hugo
A new public dir will appear inside your project, containing all your static site content, ready to be served.
Again, if you want drafts to be included, add the -D switch.
Impressive, or at least it was for me. Less than a minute and I have a complete blog in my hands.
Obviously you have a lot of possibilities customizing and tailoring everything. Follow Hugo and theme documentation if you need.
Google Cloud Storage
Cloud Storage is exactly what you expect from it: is a object storage, organized in buckets. Features:
- Geo-distributed
- Multiple storage classes
- Versioned content
- Fine-grained ACLs
- Multithreaded transfers
- Composite objects and parallel transfers
- signedURLs
and much more.
To host the site and prepare the environment, let’s start with accessing Google Cloud Console. I’ll assume that you already have a GCP account and a project.
Enable GCS API
Skip this part if GCS APIs are already enabled. Otherwise go in section “Storage” of Google Cloud Console and enable the service pushing on the proper button.
If you prefer to use the SDK, type:
gcloud services enable storage-component.googleapis.com
Wait some minute until the service goes up.
Create a bucket
Click on “CREATE BUCKET” and name your bucket with the domain of your site:
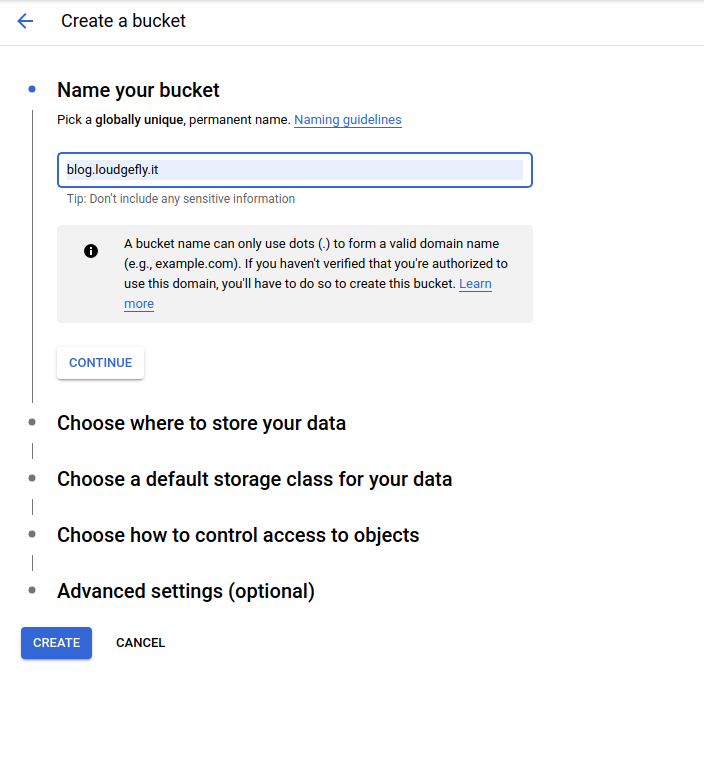
Ok, wait. To use a bucket with your domain as a name you should verify you domain using Google Search Console. If you have already verified your domain, skip this step. Otherwise, follow instructions here, once your domain property has been verified (only few minutes are needed) go back to bucket creation.
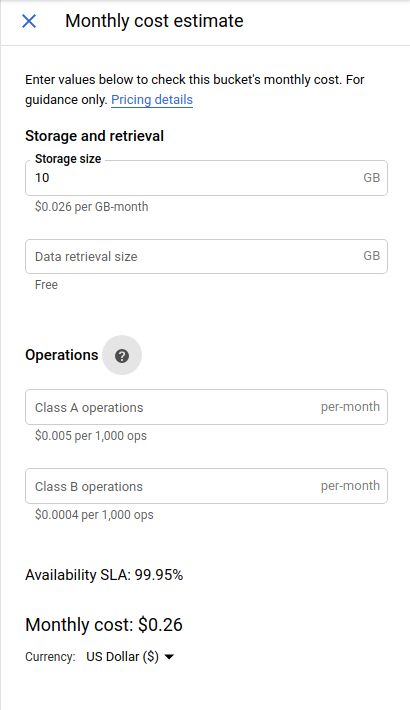
Note that from now on, your settings will affect the monthly cost of your bucket. While you proceed in the config procedure, you can check the foreseen costs on the right panel inserting an estimated used space:
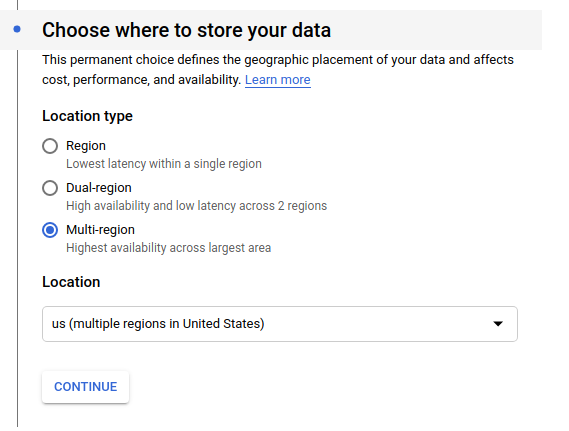
Now click on “Continue” and choose the geo-redundancy level you want, based on you need for performance and availability:
Now click on “Continue” and choose the storage class of your bucket, obviously “Standard” class is what I’d like to have for a performing website:

Click again on “Continue”, and choose your control access options. Unless you need to restrict access on specific parts of your website, you can choose “Uniform”.

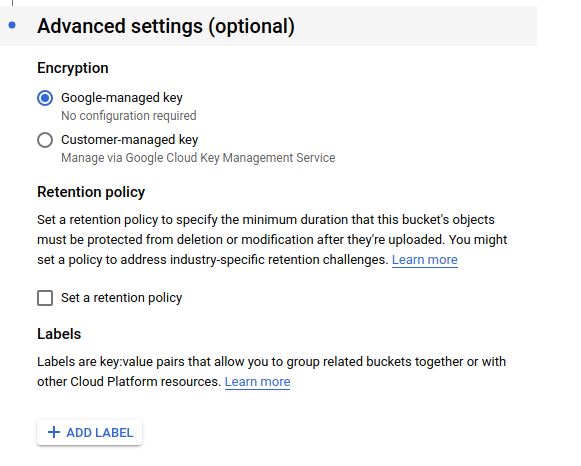
And choose if you want Google to manage your encryption key or you want to supply your own:
Finally click “Create” and wait a second.
Now go back on “Browser” section and you’ll see a list with your newly created bucket, click on the 3 points  on the right, and choose “Edit bucket permissions”. Click on “ADD MEMBER”, and choose “allUsers” for the user name e assign the role “Storage Object Viewer” (you can use auto-completion in all fields).
What are you doing? You are about to make your bucket content readable (“Storage Object Viewer” grants reads) by everyone in the world (this is the meaning of the “allUsers” user). If you need heterogeneous access to your bucket switch to “Fine grained” access control and configure ACLs as needed. Otherwise click on “SAVE” e on “ALLOW PUBLIC ACCESS” in the confirmation dialog.

Ok. Great. Now you need to upload the files, so our goal is put the content of the public dir of your site inside the bucket. Go back to the bucket list, click on the name of your bucket, and you’ll see a (empty) list of files. Now use “Upload files” and “Upload folder” to copy the content of public to the bucket.
If you want or prefere to use the SDK, there’s a better and faster way to do it, like using a classic rsync:
gsutil rsync -R <path_to_public> gs://<name_of_your_bucket>
Tip: if you are copying a lot of files, you can use multithreading adding -m just after gsutil
Now go back to the bucket list, and click on the 3 point corresponding to your bucket, and choose “Edit website configuration”. Enter (in order) index.html and 404.html:
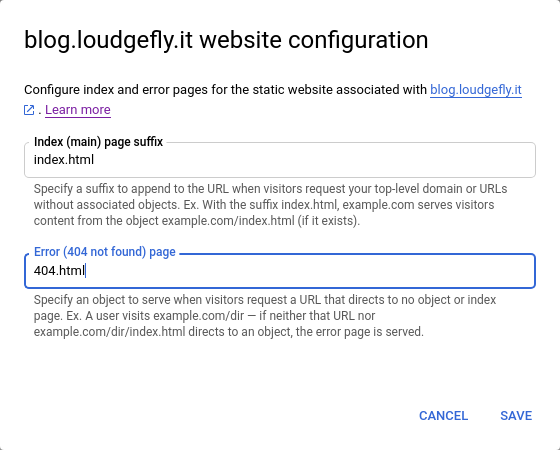
This will ensure GCS can properly answer when an index file is requested or a 404 error occurs. Corresponing files have been automatically created by Hugo.
Ok, you defined all your site content but now you need to expose it using a reachable address.
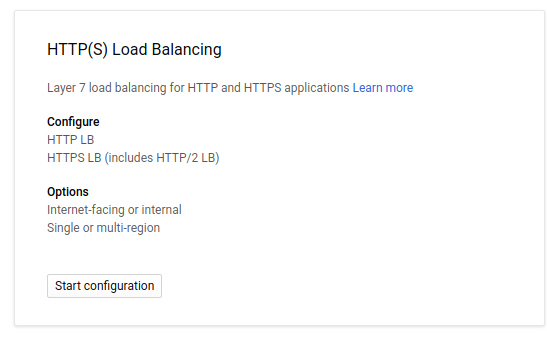
Let’s create a load balancer and configure it to use out bucket as backend. Go to “Network services” => “Load balancing” section on GCP Console, and choose “Create load balancer”, then click “Start configuration” under “HTTP(S) Load Balancing”:
Choose “From Internet to my VMs” (don’t worry, we don’t need to create any VM, it only says that the LB address will be globally exposed) and click “Continue”.
Choose a name for your LB (please choose one with a meaning, imagine you’re a GCP pro and you control hundreds of LBs), and start configure it, let’s see together each step in detail:
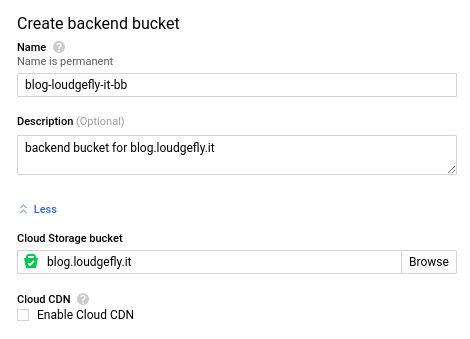
Create a backend: click on the dropdown list, select “Backend buckets” and “Create a backend bucket”. A backend bucket is simply a logical resource defined on top of a “real” bucket used as a backend for the LB. Choose (wisely) a name and your GCS bucket as destination bucket:
Leave unchanged the section “Host and path rules” unless you need advanced redirect and rewrite rules.
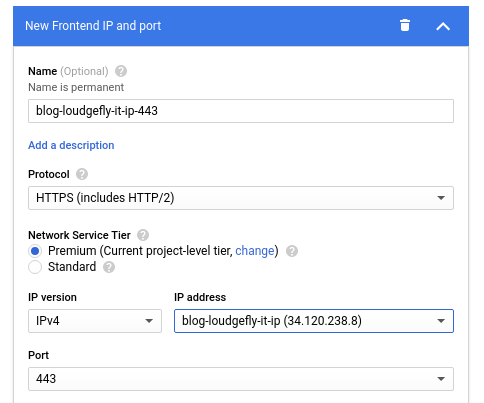
Move to “Frontend configuration”, here you define at which address your site will be reachable. Give a name for the endpoint, choose protocol (why not use HTTPS?), your desired level of connectivity, and click on “IP address” drop-down menu. If you have already set up a suitable IP, choose it from the list, otherwise choose “Create IP adresss”. Choose a name again, and click on “RESERVE” :
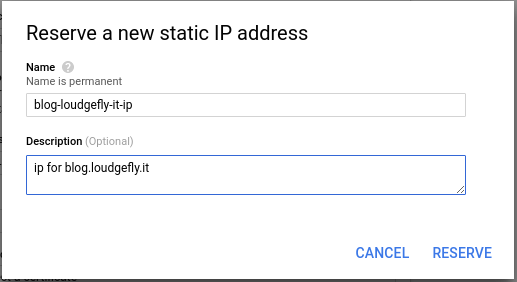
One second and a new public IP is being reserved for you by GCP, take note of it:
NOTE: at this point you should control a DNS service to properly configure address resolution, and you needed previously to verify your domain property on Google Search Console. There are a lot of services offering free domains o very cheap ones, including also a configurable DNS service (e.g. Freenom), so don’t be lazy and have your DNS in order to proceed.
Once you configured proper DNS resolution, choose a certificate for SSL. In this case I’ll generate a new Google managed (via Let’s Encrypt) one:

If you already have one, insert cert info where requested. In both cases give a wise name to your cert:

If you want, add an HTTP endpoint too, use 80 port, and same IP you used for HTTPS early. This way your site will answer on both protocols, only check if you are ok with unencrypted communication.
Click “Done” and review you configuration in the next section.
Double check everything and click “Create”.
Now you’re seeing your load balancer in a list, click on its name.
A detail page will appear. Near the HTTPS endpoint you’ll find a small informative grey circle that says “PROVISIONING” on hover. It means that your certificate is being created, signed and configured to be used by the load balancer, if you configured well all the options all you need to do is wait 10 mins.
Otherwise, check your cert definition, your DNS resolution (a check is made using related DNS record when a cert is issued and signed).
The small circle will became green and it’ll say “ACTIVE”.
This was the word you’re waiting for from a long time: now open your browser and check your new brand site on GCS.
This is actually a very simple solution to host a static site, but it’s very effective at the same time, you didn’t wrote a line of code and you have a Markdown editable blog.
This site is made using the procedure I described in this post.
For further information and options, look at this specific topic GCP official doc page.